Can tiles be laid over old tiles? This is a question frequently asked by whoever have a old tiled wall and are reluctant to chip them off for labor saving. Generally speaking, tiles can be set up over tiles provided the tiled base is stable. Before tile-over-tile refurbishment, inspect the substrate carefully and find if it is crackled, peeled, loose and moist. Once found, you shall pay close attention, for the new tiles will contort, break or fall off the wall as time goes by. A Gordian knot tilers wish to avoid is the tiles' slipping as gravity pull them towards the ground before adhesive settles. This is also related to wrong mixing of adhesive so following the instruction manual is important.
Preparing the Surface
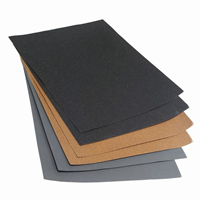
1. Remove any dirt from the tiled substrate that you're going to tile on.
2. Rough the substrate with sandpaper to help the tight stickup of new tiles.
3. Clean again the substrate when sanding work finishes.
Arranging the Tile Layout
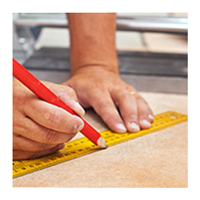
 4. Use a tapeline to find the center of the surface you're ready to tile on.
5. Place a row of unbonded tiles at the bottom according to the measurement of the center mark. Insert spacers in each gap between tiles to have a uniform spacing. You will be very likely to find that the final tile cannot fit the remaining space, which is often at the edge of the installation surface. This is normal, and leave it out for later adjustment.
6. Measure the gap between the final tile and the edge of the surface, then mark down the measurement.
7. Place another row of loose tiles as Step 5 notes in the opposite direction and measure the gap as Step 6 describes.
8. Change the location of the vertical centerline to the average spot, that is, if the gap on the left is 9 inches and the right is 6 inches, move the line 1.5 inches to the left.
9. Find the horizontal center. At this step, you’re to use a different measuring method, for vertical surface doesn't allow you to put too many rows of tiles at the bottom like you find a vertical center following Step 5-8.
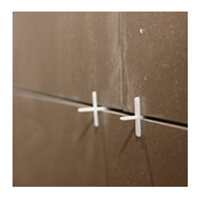 10. To find the horizontal center, first, put a tile at the center mark and hold it tight.
11. Put a spacer on the top of the tile and mark on the top of the spacer.
12. Place the bottom end of the tile at this mark and repeat Step 11 until the remaining space doesn't fit a full tile.
13. Measure and mark the gap between the last full tile and the top of the installation surface.
14. Repeat the same process Step 9-13 in a contrary manner to finish the lower part.
15. Average the upper and lower part by moving the horizontal centerline. The junction of the vertical and the horizontal centerline is the final center mark. These two lines separate the installation surface into four equal parts. It works well for you to tile a part at a time starting from the center mark.
Concocting the Adhesive Mortar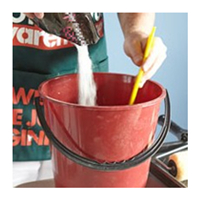
16. Pour half amount of the water that instruction suggests to a bucket.
17. Add half of the required amount of the adhesive powder.
18. Stir the water and the powder slowly with a grinder, mixer attached.
19. Add the remaining water and powder a little bit at a time while mixing until you have finished the adding.
20. Stir well and leave it aside 15 minutes to let the mixture fully blended.
Laying the Tiles
 21. Trowel proper amount of adhesive.
22. Start wiping from the center mark and don't cover the whole quarter at a time because the adhesive will dry before the tile is laid.
23. Place one tile at the center mark, edge aligned. Press it with gentle, even strength to make it bond to the adhesive.
24. Place another tile and insert two spacers in the joint. Put tiles closer enough so as to clamp the spacers.
25. Cut tiles for the space that is in irregular shape or not big enough for a full tile. Take into account the gap between tile and tile when measuring.
26. Repeat the process until each inch of the installation surface is completely covered by new tiles.
27. Allow it to dry for 48 hours. As adhesives have different drying time, you are supposed to refer to the instruction and choose a right time.
Grouting the Surface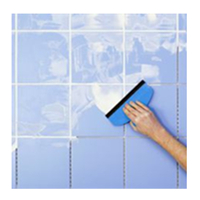
28. Blend the grout following the instruction.
29. Put appropriate portion of grout on the grout float.
30. Start grouting from inside towards outside of the room. This will save you from stepping on the fresh grout residue.
31. Grout the surface in a diagonal direction and be careful not to make scrapes on the grout surface when it is not dry.
32. Use a wet sponge to remove the excessive grout in a diagonal direction until it is stain-free.
33. Let the grout dry based on instruction.